Showing posts with label art tutorial. Show all posts

Tuesday, January 18, 2022

New Mixed Media Art--My Step by Step Process

 I especially enjoy making art this time of year--I'm pretty much hibernating now with our nasty winters that we get here.  I'm not on a time crunch like I am later in the year so I thoroughly love the process of creating.  And  I also can take the time to stop and take photos of my art process for you to see and maybe  give you some inspiration to try this too.

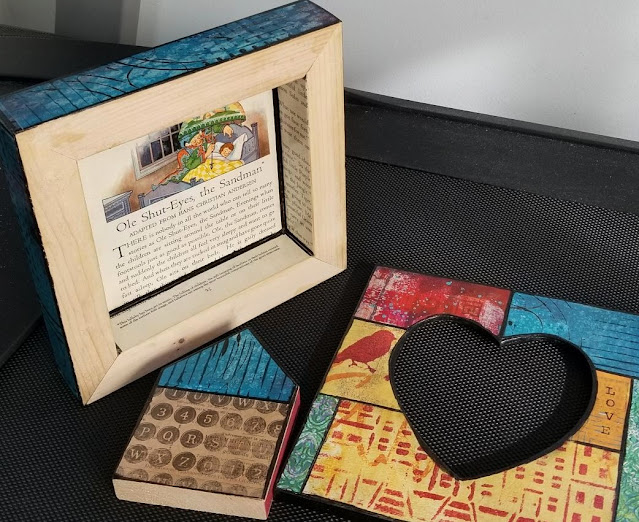
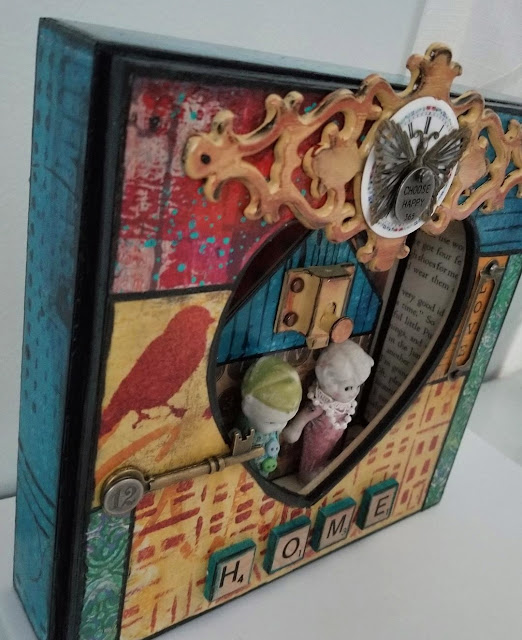
Here's the finished piece:


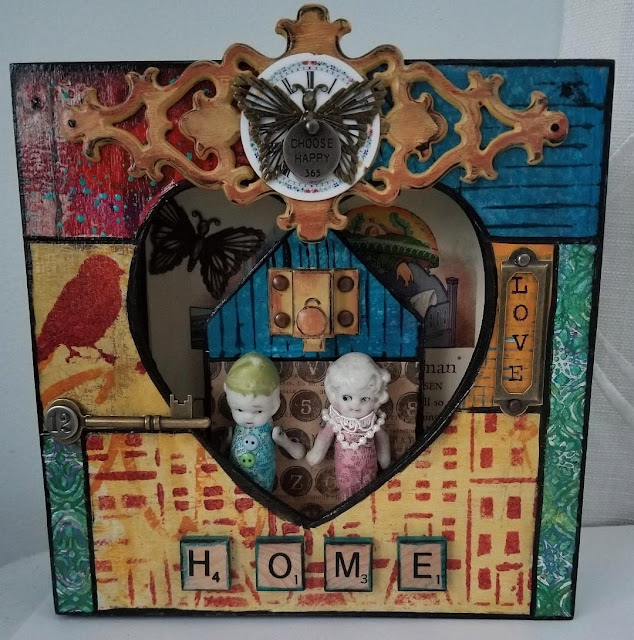
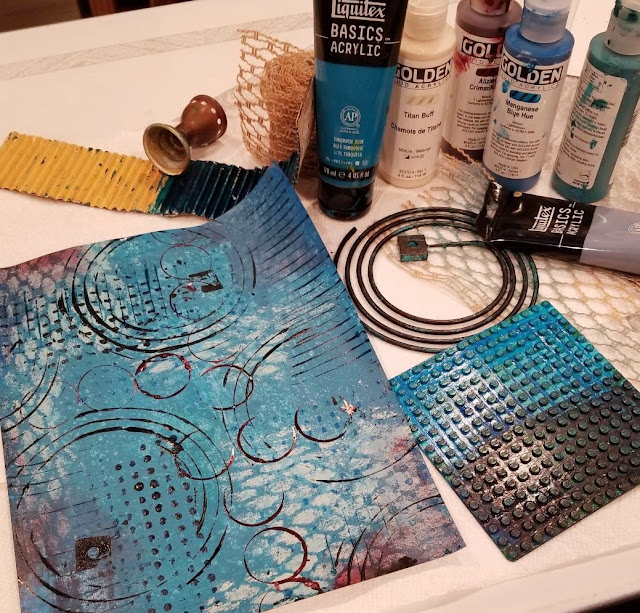
This is a dimensional piece that was a bit time consuming but very fun to do.  So as you can see it's collaged with papers that I hand painted.  I love painting papers and it's somewhat of a warm up for me. I started out looking for objects in my studio that I could make marks with on paper--


And I like to paint  some textured papers also:


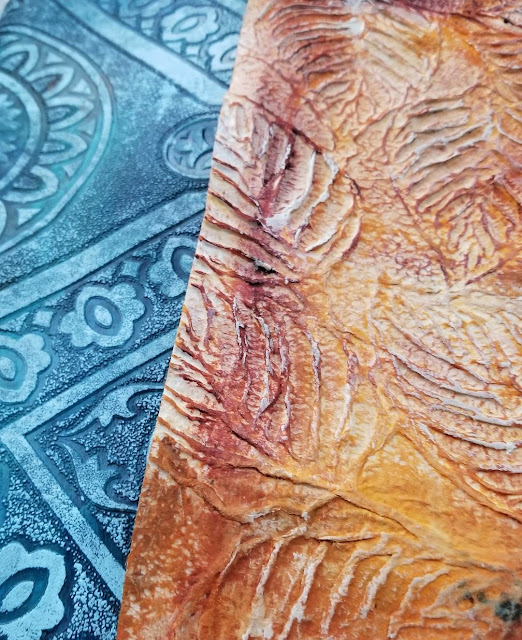
The one painted in blue is a textured wallpaper and the one painted in yellow is from an Etsy shop--HimalDesign --great hand made papers there!

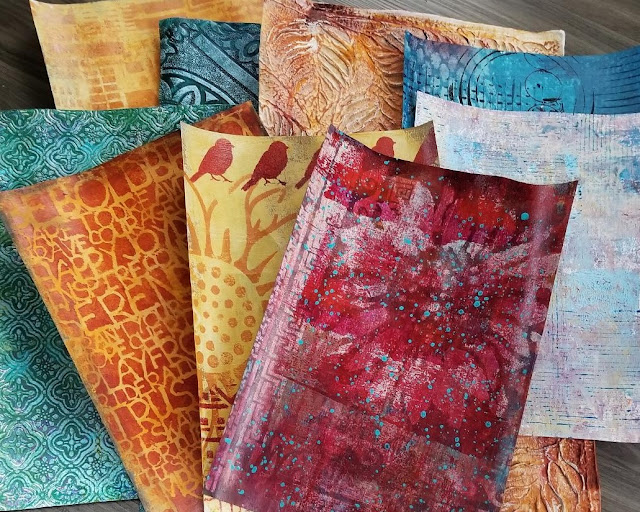
After a fun day of painting papers--I have my palette ready for my art project--(the other papers were painted on 110lb cardstock that I get at Staples--office supply store)


So going into this project I knew that I was going to transform these 2 pieces--


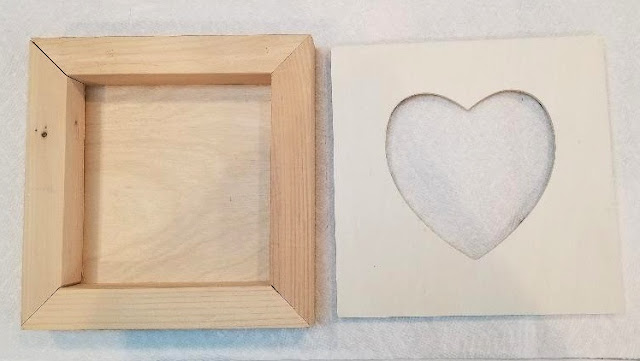
The wood square is actually a cradle board that I got from Dick Blick--I just flipped it over so it could be used as a shadowbox.  And the wood heart frame I've had forever--I found it at Michael's and I'm pretty sure they don't make these anymore--it fits perfectly over this 8 x 8 cradle board.

The next part for me is fun--I look through my plethora of embellishments and vintage finds that I have everywhere in my house.  I like to make my story before I actually put the art together--


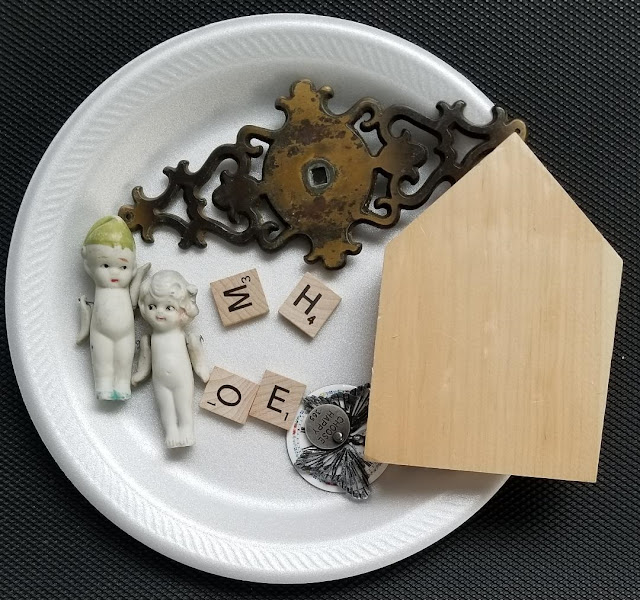
sometimes I find other objects as I go on, but the main theme will stay the same..

Next comes the paper collage part--


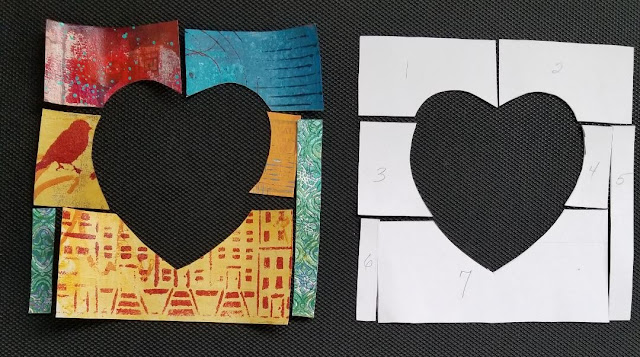
I made a template of my heart frame, marked a grid design on it, and numbered each piece, cut them and used them as pattern pieces for my papers that I wanted to collage on the  frame

Next, all my papers went on the different surfaces--


I like to use gel medium to adhere the papers and these papers are fairly thick with the paint on them, so I like to wet them down before I put on the gel medium--it makes them more pliable and easier to work with.  You could also use Mod Podge, but I prefer the gel.

So now everything comes together--


.....and don't forget the sides!   I  pretty much use E6000 for the gluing part and I nailed the heart frame to the cradle board.

I hope I've given you some inspiration to take some time for yourself to play--whatever your creative outlet is.  This was very fun and relaxing for me--great therapy for this time of year!

P. S. Right now you can find this piece is in my Etsy shop HERE

Saturday, May 1, 2021

Altering a Cigar Box From Beginning to End

 It's been a while since I've showed a step-by-step project here, so I decided it was time.  And with what else?--a cigar box!  I never get tired of making these.  Here's the finished box first--


I like the look of mosaics, but have never actually tried making a mosaic piece, so I go with the paper to mimic the look of mosaics, which is how I went with this box.   But let me back up and show you the before picture--

Just a plain old cigar box from my local tobacco store (actually this one was a little fancier) but it's all wood which is what I look for.

Next was deciding on my color palette , and pretty much all of the time when I make a box it's with collaged papers, and usually my own painted ones.  So here's the palette I decided on--

...some newly painted, and some scraps (which I have a ton of!)--

Next was figuring out my design, and since I was going the mosaic route--here's the result of the first step--

This is where a paper punch comes in handy.  I used a 1 inch paper punch for all of my 'mosaic tiles', and once they were on the box I  edged the top and bottom with washi tape.  I always use a matte gel medium for this step and also seal everything with it too, before I go on to the next step, plus on the top I added tape measure--I love using vintage cloth tape measure!

Next I had to do my black 'grouting'--

For the 'grout' look I use Faber Castell pitt pens--I like these because they blend well, but end up being permanent once dry since they are an India ink. I also like to finish off all the edges too with these pens.

Next is giving the box a little more of a design--

..by adding wood feet that I painted (you can find these at any craft store), and also giving thought to the top of the box

Now the final details--

It's these little details that lets the box shine...

And again here's the finished result--

A couple of notes.  I always seal my boxes with gloss varnish--the varnish really makes the colors pop. And also, I didn't take a photo of the inside, but I always finish it off by painting it usually the color of the feet.

I hope I've inspired you to create and if you do, I would love to see it--you can share it on my Facebook page or on my Instagram


Tuesday, June 11, 2019

New Painting/ Collage--Step-by-Step

This  is  one  of  my  favorite  ways  to  make  art--a  little  painting  mixed  with  paper  play.  Here's  the  finished  piece--


...my  Paper  Mosaic  Horses
...but  I'll  start  from  the  beginning,  which  was deciding  on  my  color  palette--


these  are  the  papers  that  I  painted  for  this  project--my  color  palette
next  I  started  on  my  background--


this  is  a  20 x 20 deep  sided  birch  cradle  board--my  favorite  type  of  surface--paint  and  a  paper  mosaic  border
next  I  made  my  horse  templates--


this  makes  it  a  lot  easier  for  me  when  I  go  to  make  my  actual  subject  with  the  papers


a  close  up  view,  and  another  shot  of  the  finished  piece--


I  don't  make  many  horses,  but  I  think  I  will  now--I  love  the  way  this  came  out.  And  here's  another  one  that  I  made  in  the  same  manner  with  a  more  familiar  subject  for  me--


I  love  elephants!!

LinkWithin

Related Posts with Thumbnails