
Some people have asked me how I make my boxes, and others have asked for a tutorial in the past few years, so I decided it was time. These boxes are really not hard to do at all, and when I break down the steps, you'll see just what I mean. The type of box I'm showing you is all collage--no painting involved, just some Faber-Castell pitt pens later for some added color.
So to start with--a box

I found this particular one at Michael's--you'll find these craft wooden boxes at any craft store. I also like to alter wood cigar boxes that I buy at my local tobacco store for a great price, and don't forget about garage sales too!--you can alter any box out there.
So next was the kind of paper that I wanted to use, and we'll call this part 3 of using my painted papers--because I have lots and lots of scraps of these laying around (literally)

When I know what color theme my box will be is when I choose the paint for the inside and bottom of it.

This time I went for a metallic paint--Metallic Bronze by Lumiere --I painted the inside lid to show you, but usually I don't, because I always collage something on it (which I did this time too), but you can always just paint it. I'll show you later what I did.
Next I just started cutting out my papers and piecing them on the box--like a mosaic to get some kind of pattern--but really, it's very random--just cut papers and start collaging--

So this was my first layer, but I never stop at one----but you could--no right or wrong--just your preference. What I use to adhere the papers is Liquitex matte gel medium. I found that the gel medium leaves less bubbles than Mod Podge or Matte medium for that matter. And the best tip I can say after you put each paper on and they're still wet is to use a brayer or old credit card to get the extra gel out, (kind of like applying wallpaper) and any little bubbles that may be in there. As far as the gel medium--it can be any brand--I personally like the Liquitex brand. And definitely coat the top of the papers with the gel medium too--it seals in the papers and coats them so you can add anything else on top of them (like paint, markers, etc), but won't soak in, in case you make a mistake and want to fix it--the paint or whatever you may be using will come right back off again (if you're not happy with it) until it dries. Just make sure before you do anything else with the box, that it's completely dry--usually an hour or so--or you can use a heat gun.
For my next layer, I got out some paper punches, and just little bits of paper, and very organically started adding them to the box--

...found a great butterfly from K & Co.--perfect for the top of the box
...and a peek at the back of the box--

The first layer on the back here were just strips of paper, and then I added the heart punch-out and more thin strips and some random scraps.
And yes, I added another layer--this time with Golden Light Molding Paste--one of my favorite techniques, and very popular these days with the all of the stencil rage going on.
.JPG)
.JPG)
You just take a palette knife and scrape the paste over the stencil and gently lift it up--it takes a while to dry--after a couple of hours it will be dry to the touch, but I like to usually wait overnight before I continue with it--except I did this type of stenciling on all 4 sides--just had to wait an hour or so between each side to make sure that the paste had set up before I went on. And as you can see, I don't clean my stencils, except when it comes to the modeling paste--it will ruin your stencil if you don't clean it immediately after using it this way.
Okay so what I did while I was waiting for all of this to dry was decide what type of feet I wanted to put on my box. I always feel that a box isn't complete without feet. I'm always trying to come up with different items to use as feet for my boxes, but this time I just used some craft wooden balls that you can find again at any craft store.

I decided on the Lumiere paint again--Metallic Olive Green, and I also went into my ABUNDANCE of old hardware that I have and painted that too--it will serve as my 'handle' for the box lid. I found that you can paint anything with any type of paint as long as you spray some kind of sealer over it when you're finished.
So now let me show you the finished box with the finishing touches--
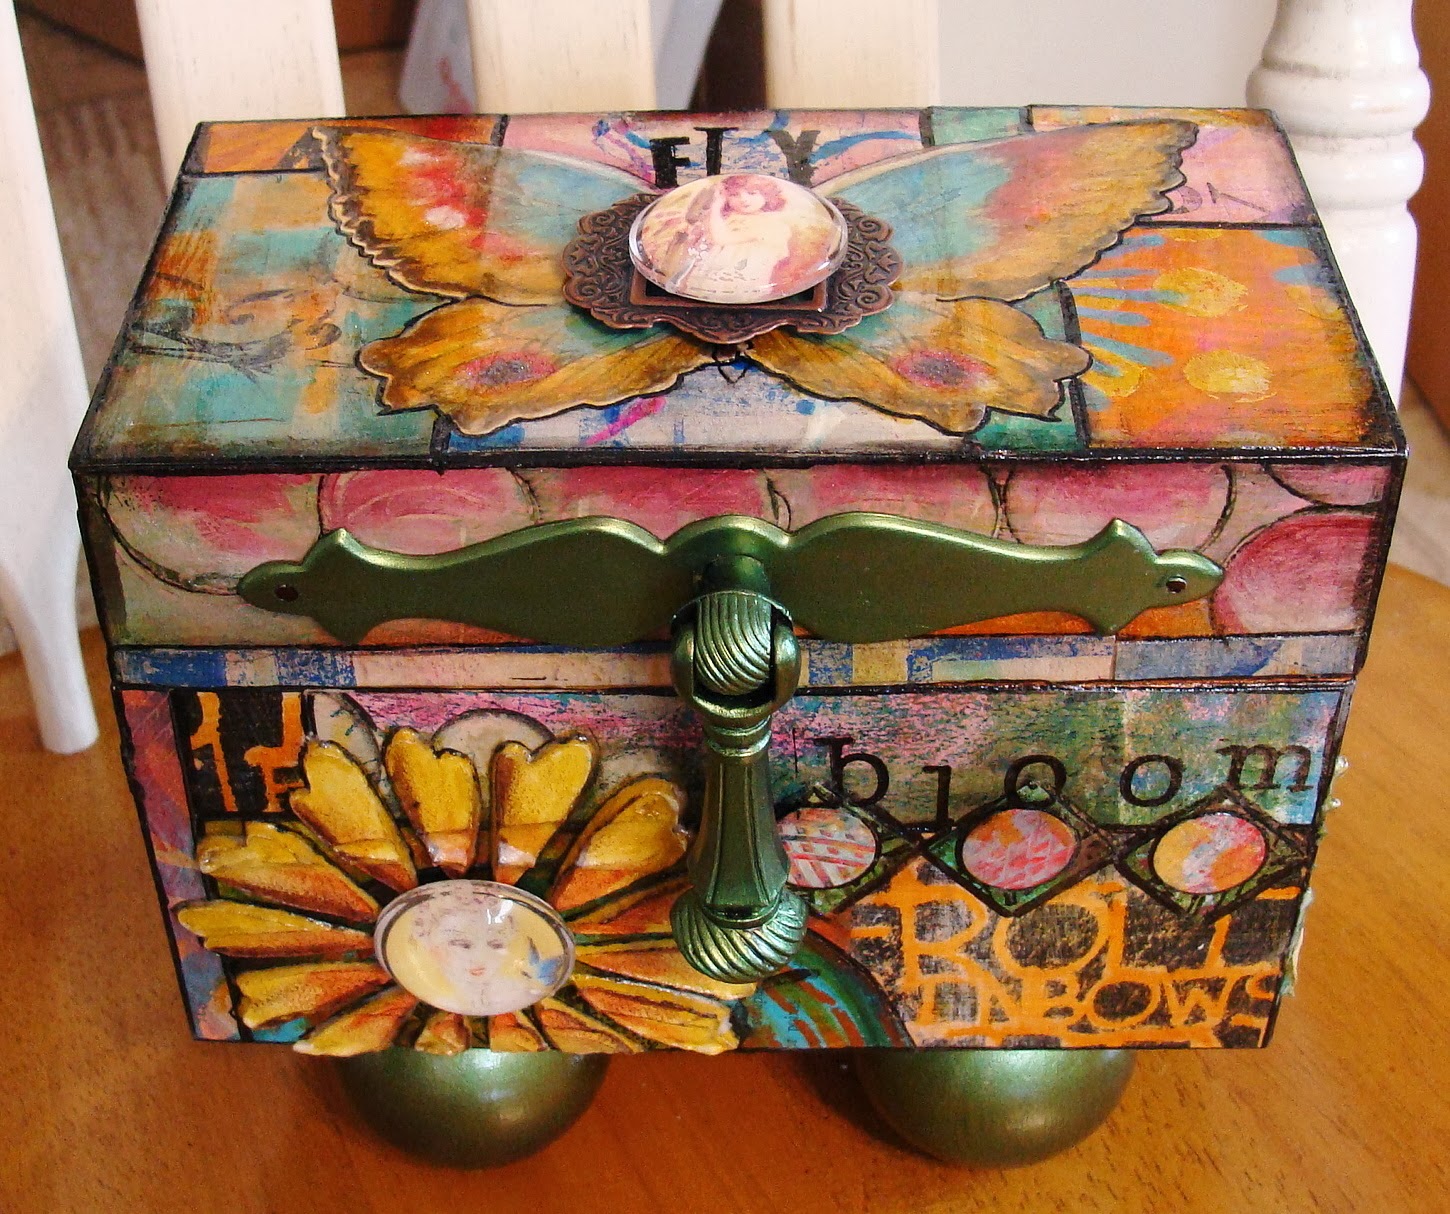


And oh yeah, I went back and finished up the inside lid too--

A couple of more things I want to add--I attach the feet with wood screws and then paint over the screw heads on the inside of the box with the coordinating paint ( the bronze), and I always seal my boxes with a gloss varnish--you could use satin or matte. The gloss is my preference--it seems to bring out the colors even more. And if you don't know by now--I LOVE color!
So I hope I covered everything--but if you have any questions--just leave a comment or email me--my email is at the top of my side bar.
Needless to say--these boxes are very fun to make--start small and just play!!
22 comments:
Изумительная фантазия! Красивая шкатулка!!! :-)))
Love it soooo....
Oh my gosh I LOVE this and am sooo inspired. I have two of these and knew I wanted to do something with them but had no idea. Thanks for sharing your process!!
This is a great tutorial and an absolutely gorgeous box! I love all the color and attention to detail.
Fabulous project.
I love this! I so want to create one too. Better get working on increasing my gelli plate scap pile :)
This is beautiful. Love the variety and colours. What brand of sealer do you use?
Kia asked what brand sealer I use--it's Minwax clear gloss. It's a polycrylic sealer for easy clean up with soap and water--I love it!
Diane!!
This is just so amazing!! Oh how I loved watching it transform! Your pile of painted papers is eye candy in itself!! Love what you have created here. LOVE!!
Thanks for sharing, Diane. Your boxes are always beautiful :)
So inspirational! Love it! TFS!
Thank you Diane for the tutorial. I'll definitely refer back to it when I start on a box. I have plenty of these type of boxes and cigar boxes but haven't done anything with them. Lovely box!
Brilliant! Thanks for sharing, appreciate all the little tips along the way.
Another beautiful piece!! I love the metallic green handle and feet too.
Diane, you always make it look so easy. Thank you for the inspiration!
Beautiful!!
I really enjoyed watching the transformation that occurred with each step. It's 11:03 pm where I am and all I want to do is run and get a box so I can try it!
Loving it.... so inspiring, think I will look thru my bag of boxes - lol! Thanks so much for sharing.
I am so intrigued with your beautiful boxes! I have made lots of cigar box purses, but now I want to try my hand at doing something like this. Thanks for the tutorial and all the tips - that helps tremendously. I love the intense, bright colors. I remember you said you use the Faber Castell Pitt Pens (I think?). But, I thought they were all black. I didn't know they made any with such bright beautiful colors? Where is the best place to buy them without spending lots of money? Or, if I'm wrong about wheat you used, please let me know. I love the flower that you did with the Liquitex and then colored it! I'm in awe of your boxes! Please show more sometime when you feel like it! Awesome job! Thanks!!
This is beautiful! Can you tell me where I purchase the beautiful paper to start this project thanks
A great tutorial!! thank you for sharing it. Can you please share further ideas cigar boxes crafts. Thanks !!
Was looking at my older cloth paper scissors magazines and loved your article on painted papers. I am also in Pennsylvania and thought I would look up your site. Thanks for this great tutorial. I love your use of color and it's great to see how you combine all the mixed media elements.
Post a Comment