Showing posts with label golden's soft molding paste. Show all posts

Monday, June 13, 2011

Still Blue...but...In a Different Way

First  of  all...thank  you  all   for  all  of  your  caring  comments  and  support--what  a  world  of  difference  a  few  words  can  do---thank  you!!   I  feel  better  and  am  not  looking  forward  to  the  Dr.'s  visit  this  week  with  Leo,  because  I  know  the  outcome.   Actually,  the  Dr.  was  preparing  me  last  week  for  this,  but  I  wasn't  ready  to  listen,  but  now  I am  and  I'm  listening  to  Leo,  and  it's  time  for  me  to  finally  let  him  go.   This  is  going  to  be  a  hard  week.

Okay...enough.....I'm  tired  of  feeling  sad......I  want  to  talk  about  about  what  makes  me  happy....ALWAYS---art!

And  Kristin's  Summer  of  Color--this  came  at  the  right  time,  and  the  color  this  week  is  blue  (oddly  enough).   But  blue  is  also  a  very  soothing  color,  and  those  are  the  hues  I  chose  to  work  with.

So  I  started  out  with  this  cigar  box  from  my  local  tobacco  store,  which  by  some  strange  coincidence  also  started  out  as  blue--


and  here's  how  it  ended  up  when  I  finished--

 
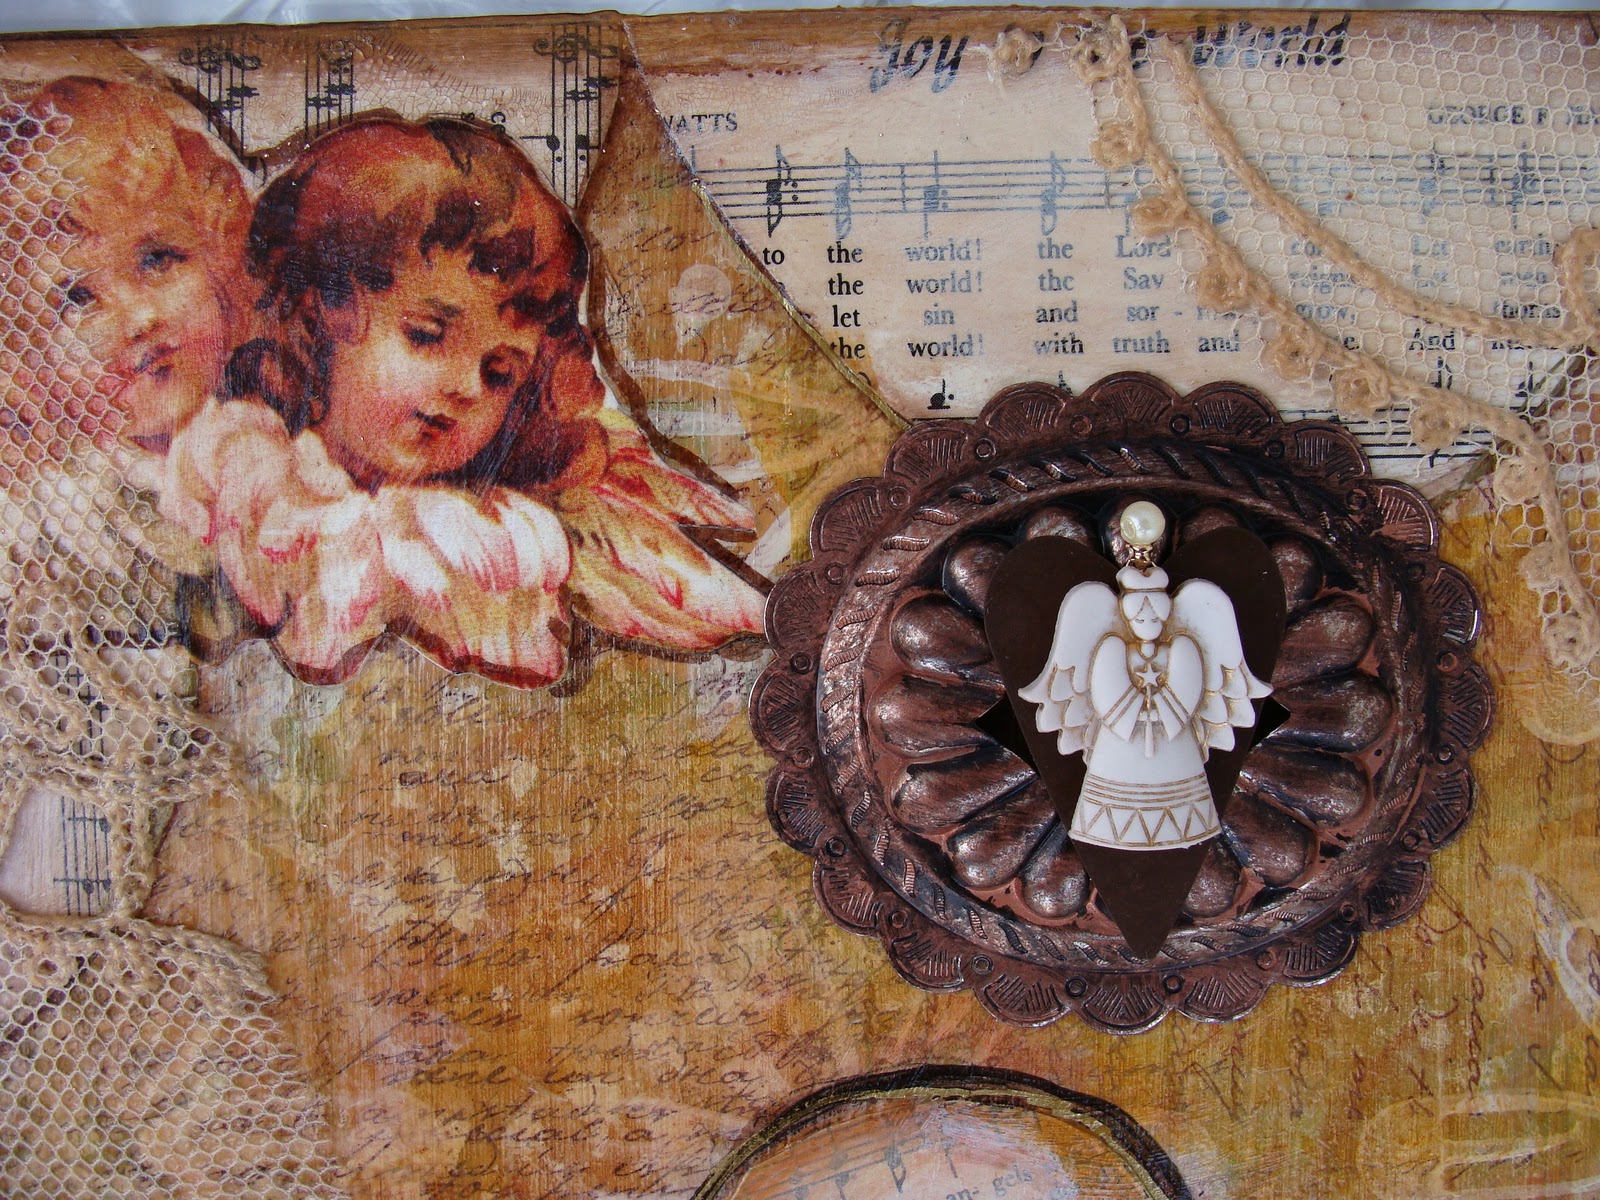
....and   let  me  show  you  the  details..

....one  of  my  favorite  techniques  that  I  use  alot--Golden's  soft  molding  paste  over  a  stencil,  and  then  when  it  was  dry,  I  randomly  stamped  over  it.   It's  a  great  technique,  in  that  it  doesn't  have  to  be  perfect  and  you  still  can  get  a  lovely  result.

....lots  of  vintage  photos  that  I  transferred  with  gel  medium  and  also  Lazertran  decal  paper.

And  sometimes  I  like  to  use  personal  photos  in  my  artwork---just  adds  that  special  touch  to  the  piece.   This  photo  is  on  the  top  of  the  box,  and  it  most  definitely  has  special  meaning  to  me...

....my  Grandmother,  my  father,  and  my  Great  Aunt...

And  I'm  always  on  the  look-out  for  old  knobs,  handles,  whatever  I  can  find  for  the  top  and  bottom  of  my  boxes--

 
So  there  you  have  it...my  blue  piece  for  Kristin's  Summer  of  Color---please  go  visit  her  blog  where  you  can  find  many  more  blue  art.   I'm  always  amazed  at  what  everyone  creates  when  given  just  one  word  to  work  with.   This  is  what  makes  this  so  fun.   Thanks  Kristin!!

...and  BTW...you  can  still  participate  too--you  have  all  of  this  week  to  join  in!!

Thursday, November 4, 2010

Peace

First  of  all--you  guys--Thank  You--all  of  you.  I  knew  if  I  asked  for  help,  I'd  get  it.   What  I've  done  is  make  a  jewelry  folder  in  my  computer  and  I've  bookmarked  all  of  the  links  that  everyone  has  told  me  about.   I  bet  you  can  guess  what  my  winter  project  is  this  year!

I've  had  to  put  my  "jewelry  making"  on  the  back  burner  for  a  bit  (but  not  for  long).  I  still  need  to  get  back  to  my  "day  job",  because  I  have  ONE  more  show  to  go.  I  must  say,  that  I  enjoy  this,  but  next  year--easing  up  on  the  show  circuit.  I  completely  missed  Fall  this  year---when  we  didn't  have  the  gloomy  days,  the  weather  here  was  beautiful--at  least  I  think  it  was--I  couldn't  really enjoy  it,  because  I  was  too  busy  here  to  even  get  out.

Oh  well--about  the  post,  and  what  I've  been  doing.  In   keeping  with  the  style  of  the  Santa  that  I  showed  you  here,  and  the  Snowman  that  I  showed  you  here,  I  made  another  angel--


I  was  struggling  with  her  at  first,  but  then  I  just  listened  to  my  own  advice,  and  let  her  help  me,  and  everything  just  came  together--


I  just  love  to  use  collage  and  lots  of  texture  when  I  make  pieces--even  if  I  try  not  to.  I  guess you  should  do  what  appeals  to  you  the  most--right?

So  in  the  end---it  all  came  together--


This  is  fairly  large--about  24  inches  long,  and  no  matter  how  many I  took, I  just  didn't  like  the  photos--but  trust  me---it's  better  in  person.  And  right  now,  I'm  working  on  another  angel  type--a  little  bit  different  medium.   I  really  do  enjoy  making  angels!


Saturday, June 26, 2010

And I Love Paper

We all do, don't we, and don't you think that the scrapbook paper world in the last 5 years or so has just gone crazy with color, textures, patterns, etc., etc.?!   I never was a "scrapper", and I think one of the  reasons  why  was because that I was never that crazy about the selection of scrapbook paper--either just plain colors or too cutesy, but not anymore.  When you go online to see all of the different kinds, you could be looking for a LONG time.  I like to go to Michael's or AC Moore's to just look at the papers for color combinations and inspiration , and I love the big paper pads that you can get with all the coordinating papers. 

And how about  the  2-sided paper?  How cool is that?!   I was at AC Moore's  last week and I found a 2-sided  one that  I really liked,  and it was not my normal colors that I would go for, but I decided to use it for my next piece using only the colors of it  (you know--the 'with one pallette thing' again).


(Love those cupboard doors!)  It's the icy blues--in person, it's actually more of a gray-blue, and the buttery creams, and white!  I never use white, and I put away the black. I usually use black for outlining or edging--I did use brown though.   So the background of this was the one side of the paper--


It's beautiful paper---scrapbook paper has come a long way.  And the flowers  have lots of texture with Golden's soft molding paste. The centers I did with tiny beads and Crsytal Lacquer, which I talked about and showed more on this post.

And how about this vase? --looks like I  finally got that 2-step crackle method down--


No.....that's the other side of the paper--I just added some highlights with paint.

And on the frame part of the door,  I combined both sides of the paper with crackle paste and those little beads again--it almost looks like it was all just painted on.


I'm really happy with the results!


But I still like to paint my own papers, and I've been busy doing just that.  This time, I wanted to use some fun colors.  I've been getting alot of different colors that I've never had before, and what better way to play around with them.


They'll be here waiting for me  when I  get  back!

Because tomorrow I'm leaving to go to the City that never sleeps, The Big Apple (do they still call it that?)---New York City!!  My son has lots of plans for us.  He teaches at a college in New Jersey, so he isn't working  right  now, which  makes it great.  And I'm  going  to  try my darndest to post photos every night, because I want you all to come along with us and have fun too.  I'm not sure about Monday's plans,  except for one.  We're going to the David Letterman show--COOL!  So if you watch on Monday night, I might just be on TV--stay tuned!

Sunday, April 25, 2010

Making Pictures With My Papers

Can I tell you how much I love taking my papers and making pictures out of them--

I think that painting the papers are as much fun as making the pictures too!


On the bottom of this one, I applied the Golden's molding paste over a stencil--it's so easy and it's a great result--


And how lucky am I?-- I found another oversized song book at a garage sale yesterday.  This time it's 400 pages and it was only  $1.00!


In all the years I've been going to these sales, I've never found these type of books.  This is the second time in a week now that I found one--that's the way it usually goes.  And linens and doilies--you can never have enough.  I have no idea what I'll do with all of these that I'm always picking up, but I have a weakness for them--


Hey, these were 25 cents each.  How can you possibly turn that down?!

Monday, April 12, 2010

A Fun Little Technique

I've been adding on to my patchwork colleciton--

These are 4 x 12 wrapped canvases,  which I also found at Jo Ann's when I was there.  It was a  pack of 3, so I'm  making another one also.  The technique I wanted to show you is on this one--


The flowers are made from  Golden's soft molding paste--


But I actually talked about this technique here.  What I wanted to show you was this one--


I started out by applying this to the spots that I wanted to apply the beads--


Crystal Lacquer--it's just like Diamond Glaze, but I like it alot better.  You don't get the tiny air bubbles like you do with the Diamond Glaze. If you've never used it  before, the results end  up being like the  2 part resin.  It has a very glassy, dimensional look, and it's an excellent adhesive. Also, if you apply multiple layers, it will get more dimensional looking.  Which is what I did--


It was still wet here when I took these photos, but  it does dry clear, which takes a couple of hours to be completely dry. I squeeze a small amount on the surface, add whatever to it, and then keep repeating the process until I'm satisfied.  I haven't done this in a while. It's also fun when you're collaging and want to scatter things--I've used buttons, old jewelry pieces, anything!  It's nice to use for small projects.  I've  never actually used the 2 part resin--has anyone?  It looks a bit tricky.

LinkWithin

Related Posts with Thumbnails