Showing posts with label painted papers. Show all posts

Friday, April 7, 2017

Playing With Paper and Paint

That's  what's  been  taking  up  most  of  my  time  these  days.   Spring  around  here  has been  very  rainy  and  gray  most  of  the  time--so  I  had  to  bring  some  color  into  my  life--with  lots  of  happy  ones--thinking  Spring  in  my  house  if  it  can't  be  outside.


This  makes  me  happy!  I'll show  you  a  little  bit  of  my  process--


This  is  on  a  10 x 29 birch cradle board.  I  cover  the  whole  surface  with  my painted  papers  and  whatever  else  I  have  at  hand.  This  is  where  this  one  ended  up--


Thoughts  of  Spring....
and  here's  another  one  in  process


This  one  is  on  a  6 x 18  cradle board (one  of  my  favorite  sizes  to  work  with).  After  I  collaged  all  of  the  papers  on  to  it  I  sketched  my  design  on  it,  and  then  started  painting--


...my  sunflower  girl--I  liked  her  so  much  that  I  put  her  on  a  6 x 6  canvas  also--


And  one  more --


My  happy  owl  scattering  some  love  :-)

Happy  Spring  everyone!!

Friday, June 20, 2014

A New Start to Finish with New Textured Hand-painted Papers

Been  super  busy--really  getting  ready for  my  summer  shows--but  I  decided  to  take  some  time  for  my neglected  blog  by  showing  you  my  latest  piece,  and  a  little  bit  of  a  tell-all  on  how  I  made  it.   So  here's  my  latest  piece--


Oh--I  just  love  these  vibrant  colors!

But  I'll  take  you  back  to  the  beginning--I  got  out  my  110  cardstock  paper  (bought  it  at  Staples),  and  my  gel  medium  and  molding  paste.....and  a  texture  tool.....and  a  stencil.


The  orange  one  on  top  was  what  I  used  my  molding  paste  for--just  laid  my  stencil  over  the  un-painted  paper  and  scraped  the  paste  over  the  stencil  with  a  palette  knife.   And  then  when  it  was  dry,  I  just  added  my  paint--lots  of  layers  for  the  depth--that's  why  I  love  using  this  cardstock--it  will  stand  up  to  anything!
And  the  bottom  two,  I  just  randomly  applied  a  fairly  heavy  coat  of  gel  medium  over  the  paper,  and  used  my  texture  tool (a  hair  pick)  to  make  random  designs.   When  dry, I  added  my  paints  and  stencils--really  turned  out  great.

Still  painting  papers--


Still  going  for  texture  with  the  corrugated  cardboard  and  the  textured  wallpaper,  and  love  this  book  page.   I  found  the  book  at  a  recent  garage  sale--it's  like  6 x 20--very  cool  size.

So  next...........


....time  to  start  playing  with  this  10 x 20  gallery  canvas.

The  start  of  it--


I  collaged  pages  from  one  of  my  favorite  books  (another  garage  sale  find  from years  ago--I  use  it  ALL  the  time)  with  Golden  Matte  Medium,  and  then  added  the  yellow  wash  of  paint  to  it.

Getting  my  'frame'  on  it--


...with  all  of  these  wonderfully-textured  papers.

And  then  I  added  the  main  design  (the  birds).  And  then  I  like  to  outline  my  collaged  papers  with  my  Faber-Castell  black  brush  pitt  pen.   It  really  makes  everything  pop--

and  it  gives  it  that  stained  glass  look


And  I  didn't  forget  about  the  sides  either!


And  that's  how  I  did  it!   I'll  call  this  post  part  1--I'll  show  you  more  in  my  'part  2'  post.

Tuesday, February 7, 2012

Favorites

This  year,  the  only  real  resolution  that  I  made  to  myself  was---starting  in  January  I  am  going  to  start  making  art  for  my  shows.   When  you  don't  have  an  art  show  until  the  middle  of  summer,  it's  hard  to  get  motivated.    But  after  last  year  (I  was  so  overwhelmed),  I  decided  that   I  had  to  do  this.    And  when  you  make  art  to  sell--of  course  you  have  to  think  more  of  what  is  popular  and  sometimes  not  what  you  really  feel  like  making.   But  in  this  case,  the   items  that are  the  favorites....happen  to  be  mine  too.


......my  latest  mirror,   and  my  favorite  so  far,  mainly  because  I  have  time  to  add  little  details  and  use  my  my  own  painted  papers.....


And  using  images  from  my  layered  piece---my  newest  boxes.....


.....these  make  me  happy  : )

.....so  I  guess  in  the  end,   if  I  never  enjoyed  the  process  of  making  these,   I  never  would  have  started  in  the  beginning,  and  they  never  would  have  been  favorites  of  shoppers---it  would  have  been  something  else  that  I  enjoyed  creating---that's  why  I  just  Love  what  I  do!!!

Tuesday, January 11, 2011

Week 2--Making Textured Papers and Journaling

I  am  rediscovering  art  materials  that  I  have,  but  haven't  used  in  a  while,  and  also  others  that  I've  never  used,  and  I  am  very  blissful  right  now!     Let  me start  out  by  showing  a  few  of  my  textured  papers   starting  with  this  one.   I  started  out--putting  an  acrylic  wash  on  very  heavy  cardstock   paper  (Golden  fluid  acrylic-- Aquamarine Blue--Great  color!)  It's  hard  to  see  the  texture,  but  if  you double  click  on  these,  you  can  see  it  better.

 
On  this  one  I  started  out  with   Golden's  
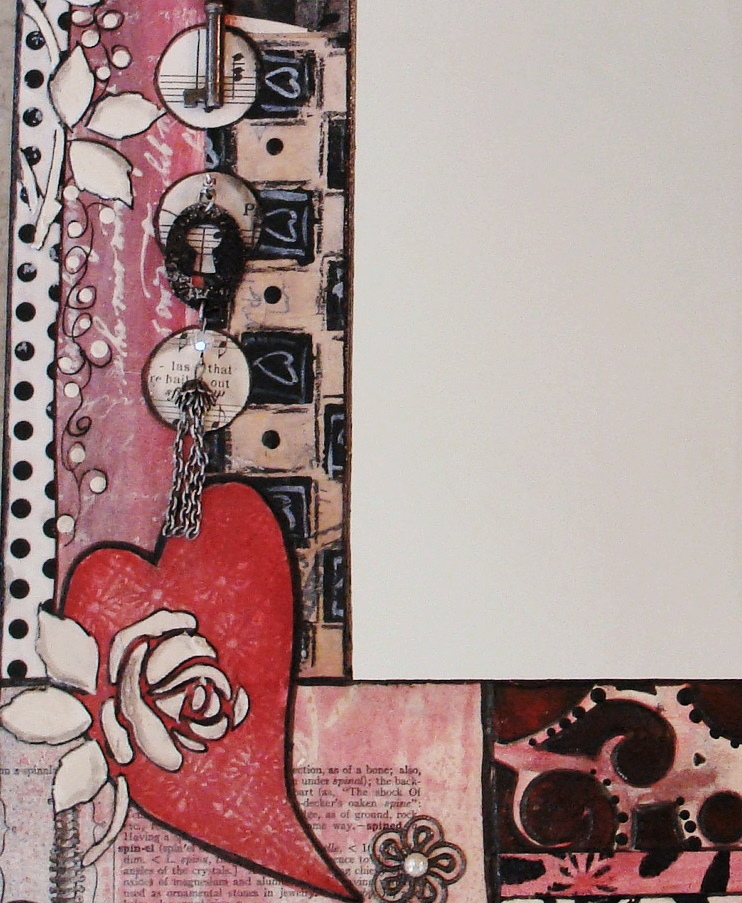
Fiber  Paste--it's  almost  like  the  soft  molding  paste,  but  when  it's  dry,  it's  very  fibery  like  paper.  And  it's  very  flexible,  which  is  what  I  wanted  so  that  I  could  cut  it  up   for  collage.

I  used  a  plastic  stencil  for  the  vines  and  flowers.  This  is  just  so  easy  to  do--and  fun.   You  just  lay  down  your  stencil,  and  apply  an  even  layer  of  the  paste  over  it  with  a  palette  knife,  and  then  when  you  lift  it  up,  you  have  your  imprint.   And  the  bottom  right-hand  corner  was just  random  paste  that  I  spread  on  and  then  scribbled  in to...BUT...do  you  see  what  I  see??

Well,  I'll  tell  you  what  I  see--a  Bird--so  I  had  to  pull  it  out  (thanks  Mystele!)


And  the  rest  of  the  paper---well,  you  know  the  rest--just  have  fun  and  add  color,  pencil,  markers--whatever  you  want  until  you're  happy--


I'm  happy!!   I  also  decided  to  put  a  layer  of  Matte  Medium  over it  just  to  add  durability  when  I  use  it.  I  know  that  I'll  be  cutting  out  the  images  for  collage,  and  since  I've  never  done  this  before  with  Fiber  Paste--I  want  to  keep  it  strong.   But  I  have  to  say  that  the  paper  I  use  really  takes  a  licking,  but  keeps  on  ticking.   It  doesn't  matter  how  much water  I  apply,  it  remains  strong.  I  get  it  at  Staples  (office  supply  store)  and  it's  110 lb  weight.  But  you  could  use  watercolor  paper--or  anything  as  long  as  it's  durable.

And  look  at  these  papers--


Wonderful-Wonderful  texture!!   I'll  show  you  how  I  did  these  in  my  next  post.

Okay,  now  on  to  week 2  of  the  Strathmore  journal  workshop  with  Pam  Carriker.  What  she  had  us  do  is  define  and  shade  our  image  with  charcoal  and  over  that  add  oil  pastels--smudging  all  the  way.   Plus  a  little  journaling  and  covering  it  with  a  gesso  wash,  and  then  adding  a  little  more  of  the  oil  pastels.  I  think  the  toughest  thing  for  me  was  the  journaling  part.  I  never  journal  my  thoughts,  but  once  I  started,  I  couldn't  shut up  (kind  of  like  the  way  I  blog  : )

I've  never combined  the  2  together  (charcoal  and  oil  pastels),  but  wow,  do  I  love  the  results--I've  already  learned  something  new  from  journaling  that  I  probably  never  would   have  tried


LOVE  this  effect!

I'm  anxious  to  see  what  week  3  brings!

P.S.   The  Christmas  cookies  are  now  gone,  and    I  am  now  going  through  withdrawal!

LinkWithin

Related Posts with Thumbnails