Welcome to 2016 everyone! I've decided to start out the year again with another piece of cat art, since my cat tutorial from a year ago was SO popular. So here's another cat tutorial for you--basically the same thing--just a little bit of a variation from the original.
Once again I warmed up by getting out my Gelli® plate and my paints and brushes and had some fun--
.....and again I'm just using here 110lb card stock that I find at my local office supply store (Staples). I also like to use scrapbook papers that I'm not too crazy about that I get in the pads --they work great, and you can get some of the background design of the paper to peak through if you like or cover it up completely--the heavier scrapbook papers hold up really well to layers of paint. And book pages are fun to use also--good ones are the over-sized children's picture dictionaries or story books (depending on the paper--they also hold up well to anything that you may want to do to them).
I chose my 'color palette' for my 6 x 18 birch cradle board--
.....and made my background with my papers--
.....and then I outlined the moon on one of my papers from the template that I made, got out my gel medium, put it on my surface, and then added some washi tape borders.....
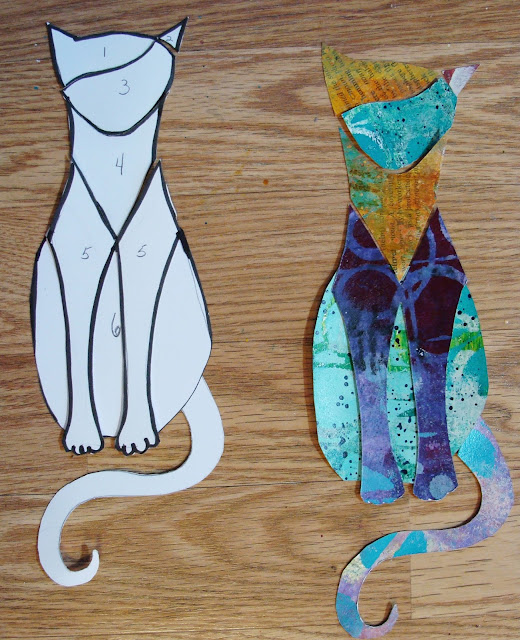
next--I drew my cat template, cut it up and numbered it for my papers that I chose to use for the cat--
--after that, got the gel medium out again and placed my cat on the moon along with some scattered stars--
This is when you want to bring the cat out of the background by highlighting and shading areas of it I used my inktense blocks for this part. If you're not familiar with these, they're watercolor sticks. You just color in the area with them and then apply water--the difference is that they're made with ink and are very intense color (I guess that's why they're called inktense). They did exactly what I wanted them to do--
You can also see here that I outlined everything with black--still using my favorite permanent pen that I used last year--my Fude Ball pen.
And I also let my muse take over and let the piece tell me what else it needed. I added some ephemera flowers on the body and along the border--
And I added the word 'wish'......and a little more embellishing...
......and also finishing up the sides.......
So now that it's all finished, it's ready to find a new home--it's for sale in my Etsy shop, which you can find HERE.
....or....start playing, and make a cat (or whatever you want) using papers that you've painted--it's fun seeing your art progress along the way--the more you play, the more you want to play! :-)


11 comments:
AMAZING!
Happy New Year!
oxo
Susi
Enchanting and Inspiring as always! Thanks for always presenting your fabulous artwork!! Teri in Costa Rica
What fun! Thank you so much for sharing your work and your process!
it,s marbellous, thanks dear friend!
Lovely Cat Collage. I first thought it was created out of fabrics. Thank you for sharing your Gelli paper process. 2016 will be an amazing year...
Just adorable!!! Love every bit of it!
Fabulous!! I so love your work xx
I love it, the cat is so adorable and the colours are fabulous!
Just looking at this makes me smile!!!!
Lori from Gathering Stars Studio
Beautiful! What do you seal it with? Glaze or Decopauge?
Beautiful! What do you seal it with? Glaze or Decopauge?
Post a Comment